What to do if emails dont arrive
Here we explain what you can do if reports are not reaching your customers.
If you notice that you or your customer are not receiving the reports you have posted, or that they are being declared as spam, the main reason for this is in most cases the so-called spf record of your domain.
You now have two options for solving this problem:
1. the spf entry:
Put simply, this spf-record defines which servers are authorised to send emails in your name. For example, if you want to use info@<ihrefirma>.de as the sender address, the corresponding TXT entry in the DNS settings of the corresponding domain (<ihrefirma>.de) must be adjusted.
For the sake of simplicity, we have already summarised all COREDINATE servers that send e-mails in a corresponding entry (spf.coredinate.de). If you add this to your spf entry, you officially authorise our servers to send your e-mails.
One example:
Ihr spf-Eintrag lautet: v=spf1 include:spf.protection.outlook.de -all
You must then write an include:spf.coredinate.com before the include:spf.protection.outlook.com so that the entry is adapted accordingly. The finished entry then looks like this:
v=spf1 include:spf.coredinate.com include:spf.protection.outlook.com -all
The administrator who looks after your domain knows how these entries are made and where. The link to spf-record.com is provided with the permission of Internexum.de
Many public e-mail providers (e.g. t-online) declare the e-mails as spam. Hence the following tip:
If you do not know how to change this spf entry and do not know anyone who can enter it for you, please enter noreply@coredinate.com as the sender address. Your emails should then appear in your usual mailbox again.
2. Set up your own e-mail server in the portal:
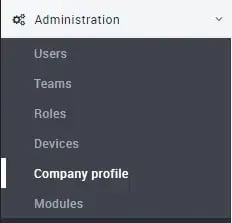
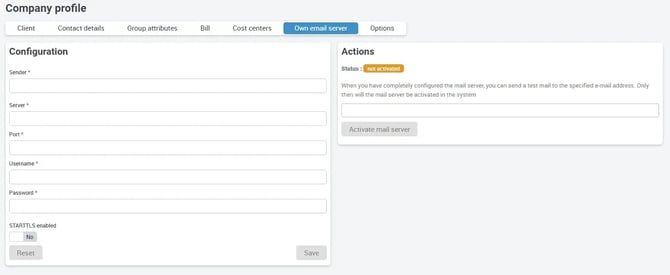
Please log in to the portal as an administrator. In the main menu on the left, please click on Administration – Company profile and then on My e-mail server in the tab bar on the right. You will see the following view:


Now click on the green Set up mail server button and the configuration view appears:

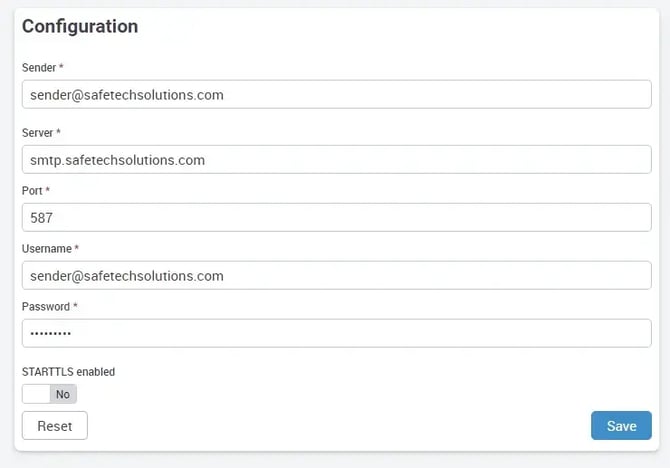
Here in the configuration you have the option of editing the entries:

Please enter all necessary data here.
Your contact person for your email server or IT will usually know which entries and ports you need and whether STARTTLS needs to be activated.
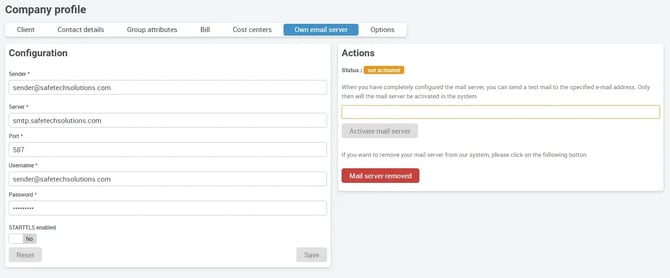
Once you have made all the entries, please click on Save. Finally, you must activate the mail server. As shown in the following image, enter an e-mail address to which the test e-mail is to be sent, then click on the green Activate mail server button below.

A test mail is immediately sent to the mail address you entered and your mail server is active.
If you no longer need the mail server that you have set up or want to change it, please click on the red mail server removed button. The mail server is then deleted and you can create a new one if required.
Please note that Gmail accounts do not work with the mail server!
With other mail providers, you may have to activate the option in your e-mail account before you can send e-mails from your own account. You can find out how to do this from your mail provider or look it up on the Internet.
If the activation was successful, you will receive the following display and you can now send the reports to your customers via your own mail server.
