COREDINATE is designed in such a way that, in principle, you can start scanning checkpoints as soon as you log in to the system (you can find out how to do this here). This means that even employees with little experience of using smartphones can at least document their attendance.
Checkpoints can always be scanned with COREDINATE as soon as your employees have logged in to the app.
If you want more advanced functions, a tour must be set up. This enables helpful functions such as the
Monitoring of completeness: Are all checkpoints visited?
Monitoring the sequence: Are my employees following the correct sequence?
Create a new tour
Think of a tour as a container in which you can place the individual checkpoints to be visited on this tour.
Only when our online guard control system knows which checkpoints make up the tour can it monitor the completeness and, if required, the sequence of the checkpoint scans.
To create a new tour, proceed as follows:
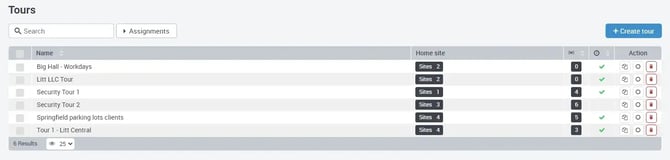
In the portal, open the entry Master data in the main menu on the left and then Tours.
A list will appear with the tours that have already been created (which may of course still be empty) - please click on the symbol on the right, above the list with the plus sign, to create a new tour.
Another window opens in which you can enter the name for the new tour and assign it to the area in which it is to be executed. To do this, either use the search field in which you enter the name of the area or the tree structure below.
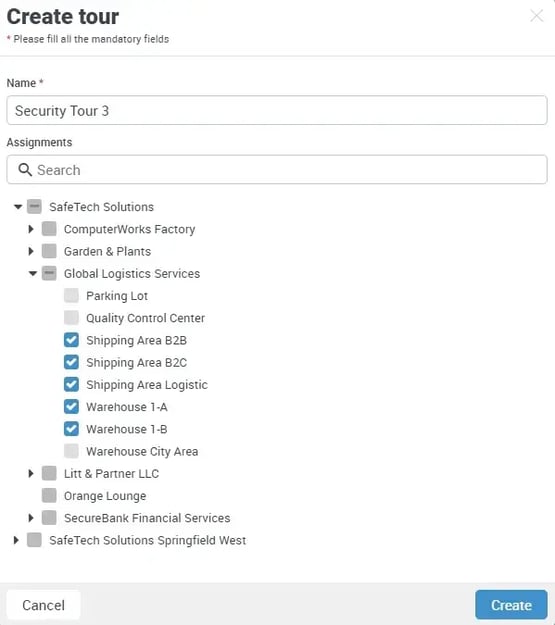
As soon as we have defined a name and an assignment and clicked on Create, the new tour is opened in the detailed view.
Add checkpoints to the tour
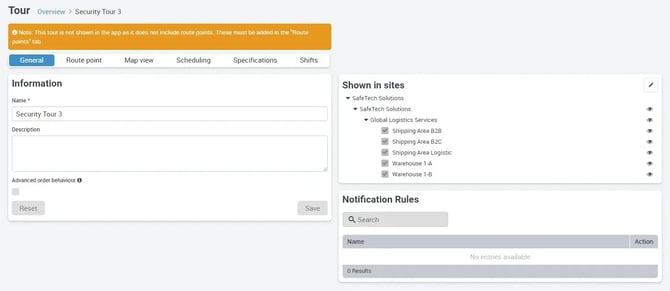
If you are not already in the detailed view of the tour, first click on Master data in the main menu on the left and then on Tours. Open the desired tour by clicking on the corresponding entry and the detailed view of the tour will open.

Now click on Route point to the right of General and in the window that opens, click on + Add route points. A selection window with a tree structure opens, in which you can add individual control points (or all of an area at once).
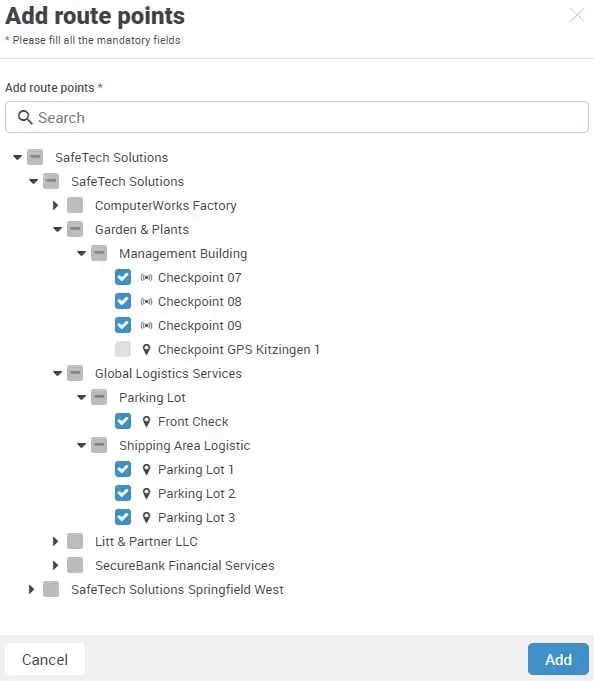
Your programmed beacons with a Bluetooth symbol or GPS points with a pin, which you can add to a tour, are also displayed here. Select the desired control points to be included in the tour and click on Apply. You will now see a list of the control points you have just added:
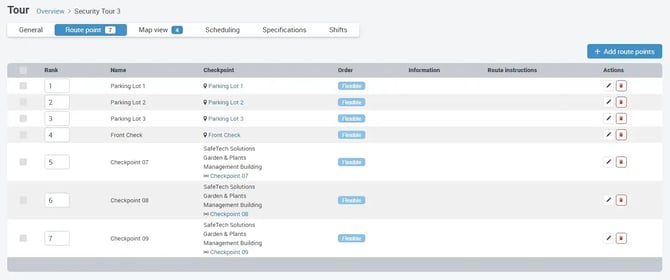
NFC control points, GPS points and beacons can be completely mixed in a tour.
In the following table, we would now like to explain each individual column of this view:
Rank
You can use these symbols to move individual checkpoints in the direction of the respective arrow within the tour. This changes the order in which the checkpoints are to be run through. However, the sequence is only relevant if you have selected the Mandatory entry in the Sequence column.
Name
Enter a name for this station here that the employee will see on the mobile device - normally the same name is selected as was used for the checkpoint, but a different name (e.g. start or end) is possible at any time.
Checkpoint
In this field, select which checkpoint is to be addressed at this point. This is the name that will appear later in the report.
Order
COREDINATE can also monitor compliance with the correct sequence. Select Mandatory so that your employee receives a message if they do not approach the checkpoints in the correct order and select Flexible if you want your employees to decide the order of the scans themselves. In practice, Flexible is usually preferred as employees then implement their own sequence and are therefore less predictable for uninvited guests.
Informations
Enter any information about this route point here. (e.g. No smoking from here, Helmet compulsory from here)
Route Instructions
Small hints on how to reach the next checkpoint are very helpful, especially in properties that are rarely entered or for new employees. Under To next point, enter in text form how the employee can find the next checkpoint on this tour (e.g. On the 1st floor, walk along the corridor and then turn right) and under To previous point, enter how to find the way back to the last point.
Functions
You can use the pen and the recycle bin to edit individual checkpoints on the tour or delete them completely from the tour. If you delete individual checkpoints from the tour, the checkpoint itself remains in the system - it is only removed from the tour.
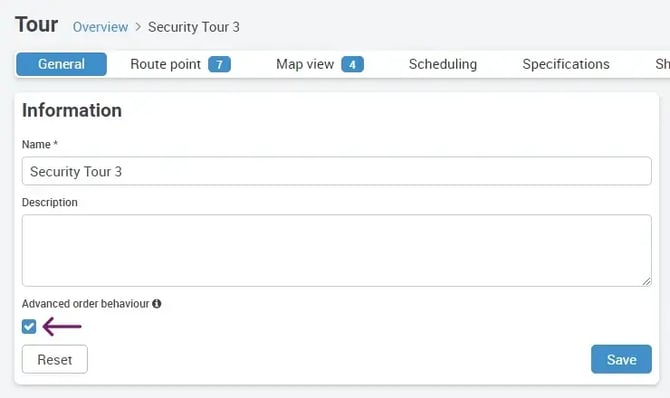
Defining the sequence of checkpoints to be scanned
You have the option of specifying whether the checkpoints you have created in the tour must always be scanned in the specified order or whether the checkpoints can be scanned in any order.
This is what the Advanced order behaviour is for.
Simply select the desired tour from the list of tours by clicking on it. Activate strict compliance with the checkpoint sequence by clicking on the gray field in the following image.
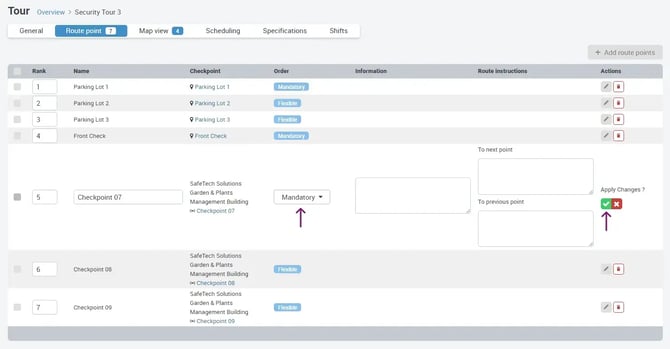
By deactivating Advanced order behaviour (see previous image), the control points can be scanned again in any order.
Change the order to Mandatory or Flexible as required and then click on the green check button next to Apply changes to save the changes.
If you cannot read the text in the images, simply right-click on the image and select Open image in new tab or Save image as, then it will be displayed in its original size.
If the Advanced order behaviour is activated, the checkpoints must be scanned as follows:
